Hiiii! I am soo happy about this post! this Recipe needed some work, to get as good as it is and I finally found a way to make vegan Cheesecake bites and I am not too sure if you would even notice the veganness (sorry for the made up word) while eating. I feel that’s a plus (especially if you serve this to non-vegans, that believe vegan food is gross or boring).
This Cheesecake is easy to make, all you need is a blender. It’s a non-bake Cheesecake and you can easily prepare it a few days ahead.
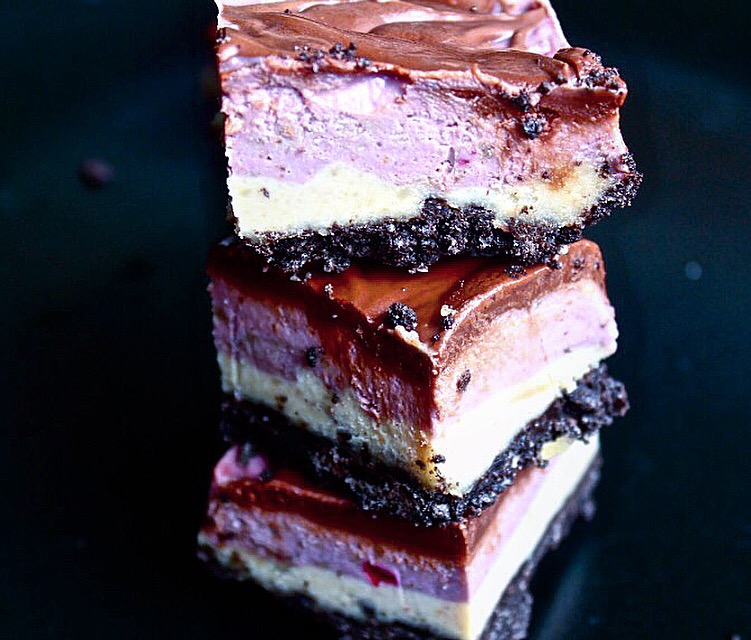
I chose to make 2 layers of flavour:
Peanut Butter (of course!) and Raspberry (mmmh, of course!), combined with a dark chocolate cover and a Oreo Crust.
So enough said! Here the Recipe! And haaave fun!

Ingredients:
Crust:
- Oreo Cookies (about 25)
- 2 Tbsp. Coconut Oil
Filling:
Peanut butter Layer
- 1.5 Cups of Cashews (soaked for 3 -4 hours in Water)
- 3 Tbsp. Peanut Butter
- 3 Tbsp. Coconut Oil
- 2 Tbsp. Lemon juice
- 1/2 Cup Coconut Milk
- 1/2 Cup Maple Syrup
Raspberry Layer
- 1 Cup of Cashew (soaked for 3-4 hours in Water)
- 2 Tbsp. Peanut Butter
- 2 Tbsp. Coconut Oil
- 1/2 Maple Syrup
- 1.5 Cups Raspberries
- Coconut Milk if more liquid needed
Chocolate Ganache layer
- 1.5 Cups of dark vegan chocolate
- 3 Tbsp. Coconut Milk

Layer out a baking Tray with baking paper
Add the Cookies and Coconut Oil to the food Processor and blend to crumble it up. Press the crumbled Cookies on the bottom of the baking tray. Put into the freezer for 5-10 minutes.
Add to the Blender all the ingredients from the first layer and mix until you have a creamy texture.
Fill in the first layer on top of the cookie crust. And freeze for 10 minutes.
Add to the blender all the ingredients from the second layer and mix until you have a creamy texture.
Now fill the layer on top of the first layer. Freeze again for an other 10 minutes.

Make the Chocolate Sauce by mixing the chocolate and the Coconut milk in a little bowl over steaming water.
Drizzel the Sauce on top of the second layer. I used a tooth pick to make ornaments (my skills still have need some training though).

Freeze again until you want to serve it.
Before serving, take it out for about 15 Minutes and cut squares.

Enjoy! Emily

Wow…….its drooling……love it 🙂
thank you 🙂
Love the layers of different colors!
thank you so much! 💜
Wow this looks incredible!
thank you! 💜
These sound and look AMAZING! I’ll totally try and let you know what I think! Pinning 🙂
yes please! so curious what you think! i hope you love them as much as i do ☺️💜
So pretty ! Awesome job. Need to make these 🙂
thank you! 💜
woahh- looks amazingg- i made a cheesecake a few days ago so i’ll be sure to make this one next time and try it out!
thank you! what kind of cheesecake did you make? if you try this one, tell me how it came out!
i had made a lime cheesecake!